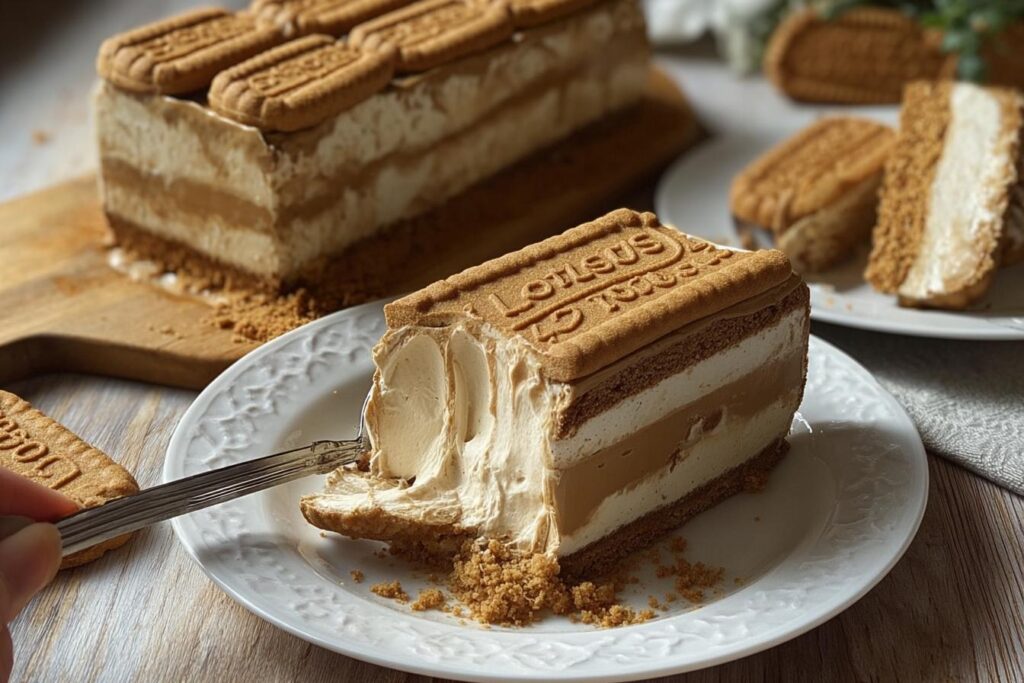
Oh my goodness, you have no idea how dangerously good this Lotus Biscoff ice cream cake is! The first time I made it, my family actually fought over the last slice – and these are people who normally share nicely. It’s that magical combination of crunchy Biscoff cookie crust, creamy vanilla ice cream, and that irresistible cookie butter swirl that makes it impossible to resist.
The best part? You don’t even need to turn on your oven! I love no-bake desserts like this when I need something impressive but don’t want to spend hours in a hot kitchen. Just layer, freeze, and watch it disappear. Trust me, this cake has become my go-to for summer parties and “I-need-dessert-now” emergencies alike.
What makes it special is how the caramelized Biscoff flavor seeps into every layer. That first bite takes you right back to childhood cookie cravings, but all grown up and fancy. I’ve lost count of how many times I’ve made this, and every single time, someone asks for the recipe. Fair warning – it’s addictively good!
Why You’ll Love This Lotus Biscoff Ice Cream Cake
Let me count the ways this dessert will steal your heart (and probably your willpower)! First off, it’s ridiculously easy – no baking means no stress, just layer and freeze. The flavor? Pure magic. That rich, caramelized Biscoff cookie butter swirl paired with creamy vanilla ice cream is a match made in dessert heaven.
Here’s what makes it so special:
- No oven required – perfect for hot summer days when baking sounds awful
- Impressively delicious with minimal effort (your secret is safe with me)
- That addictive cookie butter flavor in every single bite
- Make-ahead friendly – actually tastes better after freezing overnight
- Crowd-pleaser guaranteed – I’ve never brought leftovers home from a party
Seriously, this cake checks all the boxes. Easy, delicious, and always a hit. What’s not to love?
Ingredients for Lotus Biscoff Ice Cream Cake
Gathering your ingredients is half the fun with this recipe! Here’s exactly what you’ll need to create this dreamy dessert (and yes, those extra cookies for “quality testing” are absolutely necessary):
- 32 Lotus Biscoff cookies (plus a few extra for decorating – we all know some will mysteriously disappear!)
- 2 cups Biscoff cookie crumbs (just pulse the cookies in a food processor until fine)
- 6 tablespoons melted butter (I use unsalted, but salted works too if you like that sweet-salty contrast)
- 1 1/2 cups Biscoff cookie butter, divided (keep it at room temperature for easy spreading)
- 4 cups vanilla ice cream, slightly softened (about 15 minutes out of the freezer does the trick)
- 2 cups whipped topping or homemade whipped cream (cold is best!)
- 8 oz cream cheese, softened (don’t skip this – it makes the layers so creamy)
- 1/2 cup powdered sugar (sifted if you’re feeling fancy)
- 1 teaspoon vanilla extract (the good stuff makes a difference)
- 1/4 cup heavy cream, optional (just in case your cookie butter needs thinning)
See? Nothing too crazy – just a perfect mix of pantry staples and special treats. Now let’s make some magic!
Equipment You’ll Need
Don’t worry – you don’t need any fancy gadgets for this beauty! Here’s what I always grab from my kitchen:
- 9×5 inch loaf pan (or an 8×8 square dish works great too)
- Parchment paper (for easy lifting – trust me, you’ll thank me later!)
- Mixing bowls (one big, one medium should do the trick)
- Electric mixer (but a whisk and some elbow grease can work in a pinch)
- Spatula (for all that delicious spreading and scraping)
- Measuring cups and spoons (eyeballing it never works with layered desserts)
That’s it! Now let’s get layering.
How to Make Lotus Biscoff Ice Cream Cake
Okay, let’s get to the fun part – assembling this glorious treat! Don’t let the layers intimidate you – it’s seriously just about stacking deliciousness. The key is working quickly but carefully. I like to prep everything before I start so I’m not scrambling mid-process (learned that the hard way when my ice cream started melting everywhere!).
Preparing the Crust
First things first – that irresistible crunchy base! In a medium bowl, mix your Biscoff cookie crumbs with the melted butter until it looks like wet sand. You want it to hold together when you pinch it. Now line your pan with that parchment paper (leave some hanging over the edges – lifesaver alert!). Press HALF of this mixture firmly into the bottom of your prepared pan. I mean really press it – use a measuring cup or the back of a spoon to compact it well. This is your foundation, so make it sturdy! Pop it in the freezer for about 15 minutes while you prep the next layers.
Layering the Cake
Time for the creamy magic! In a large bowl, beat the softened cream cheese with powdered sugar and vanilla until smooth. Gently fold in your whipped topping until it’s all fluffy and combined. Now spread HALF of this creamy mixture over your chilled crust. Work carefully but quickly – we want distinct layers here!
Next, spread your slightly softened vanilla ice cream evenly over the cream layer. Pro tip: Let the ice cream sit out just until it’s spreadable but not soupy – about 15 minutes usually does it. Now for the star – take 1 cup of your Biscoff cookie butter and warm it slightly (I zap it for 15 seconds or stir in that optional heavy cream if it’s too thick). Drizzle or spread this liquid gold over the ice cream layer. Sprinkle the remaining crumb mixture over this – it’ll create this amazing texture contrast!
Finish by adding the rest of your cream mixture and smoothing it out. Then dollop or drizzle the remaining 1/2 cup cookie butter on top. Arrange those whole Biscoff cookies across the top however you like – I go for a neat row, but haphazard looks cute too!
Freezing and Serving
Here’s where patience comes in – cover that beauty tightly with plastic wrap and freeze for at least 6 hours, but overnight is best. The flavors really meld together beautifully. When you’re ready to serve, grab the parchment “handles” to lift it out. Run a warm knife under hot water and dry it quickly before slicing – this gives you those perfect clean slices. Serve immediately (it’ll start softening fast!) and watch the happy faces all around!
Tips for the Perfect Lotus Biscoff Ice Cream Cake
After making this cake more times than I can count (okay, maybe I can count, but I don’t want to admit how many!), I’ve picked up some foolproof tricks:
- Timing is everything – Let your ice cream soften just enough to spread easily, but not so much it turns soupy. About 15 minutes on the counter usually does the trick.
- Layer like a pro – Use an offset spatula or the back of a spoon dipped in warm water to get those layers perfectly smooth.
- Freezer burn be gone! – Press plastic wrap directly onto the cake’s surface before freezing to prevent ice crystals.
- Cookie butter hack – If your cookie butter is too thick to drizzle, warm it with a splash of heavy cream for perfect ribbon consistency.
- Slice smart – Dip your knife in hot water between cuts for picture-perfect slices every time.
Trust me, these little touches make all the difference between good and “Oh my gosh, give me the recipe!” amazing.
Variations and Substitutions
Oh, the possibilities! This recipe is like your favorite pair of jeans – totally customizable to fit your mood. Swap the vanilla ice cream for coffee or caramel for a grown-up twist. Nut allergy? No problem! Just skip the cookie butter (I know, heartbreaking) and use melted chocolate or dulce de leche instead. For a lighter version, try frozen yogurt instead of ice cream – though fair warning, it won’t be quite as decadent. My neighbor even tried it with chocolate sandwich cookies instead of Biscoff (blasphemy, but she swears it worked!).
Serving Suggestions
Oh, let me tell you how I love to serve this beauty! A hot cup of coffee alongside is absolute perfection – that caramelized Biscoff flavor just sings with a good brew. For special occasions, I’ll drizzle extra warmed cookie butter or caramel sauce over each slice. Fresh berries add a lovely pop of color and cut through the richness. And if we’re being totally honest? Sometimes I just grab a fork and eat it straight from the pan – no judgment here!
Storage and Reheating Instructions
Here’s the beautiful thing about this cake – it actually gets better after a day in the freezer! Just wrap any leftovers tightly in plastic wrap (press it right against the surface), then cover with foil or pop it in an airtight container. It’ll keep happily for up to 2 weeks. When you’re ready for another slice, no need to thaw – cut what you want and put the rest back immediately. The one rule? Never refreeze after thawing completely, or you’ll get sad, icy layers instead of that dreamy texture we worked so hard for!
Lotus Biscoff Ice Cream Cake FAQs
I get so many questions about this cake – let me answer the ones that pop up most often!
Can I use homemade whipped cream instead of whipped topping?
Absolutely! I actually prefer it. Just whip 1 cup heavy cream with 2 tablespoons powdered sugar until stiff peaks form. The texture is dreamier, but it might soften faster when serving.
How long does this cake last in the freezer?
If it lasts more than 2 days in your house, I’m impressed! Properly wrapped, it keeps beautifully for 2 weeks. After that, the texture starts changing. But let’s be real – mine never makes it past day 3.
Can I make this ahead for a party?
This is the BEST make-ahead dessert! Actually, you SHOULD make it at least 6 hours ahead – overnight is even better. The flavors need time to mingle and become best friends in the freezer.
My cookie butter is too thick – help!
No worries! Just warm it slightly (10-15 seconds in microwave) or stir in that optional heavy cream until it’s drizzling consistency. Too thin? Add more cookie crumbs!
Can I use a springform pan instead?
Of course! Just line it with parchment for extra insurance. The slices will be taller and more dramatic – perfect for showing off those gorgeous layers!
Nutritional Information
Okay, let’s be real – we’re not eating ice cream cake for the health benefits! But since you asked, here’s the scoop (pun intended). Nutritional values vary based on your specific ingredients and how generous you are with that cookie butter drizzle (no judgment from me!). As a general guide, each slice packs that perfect balance of rich, creamy deliciousness we all crave. Remember, these are estimates – your mileage may vary depending on brands and any custom twists you add. Now go enjoy that slice guilt-free!
Share Your Creation
Did you make this dreamy Biscoff creation? I’d love to hear how it turned out! Snap a pic of your masterpiece (especially if your layers look prettier than mine did the first time) and tag me – nothing makes me happier than seeing your cookie butter triumphs!
You can also share it on Pinterest!
Print“5-Ingredient Lotus Biscoff Ice Cream Cake That Steals Hearts”

A delicious no-bake Lotus Biscoff ice cream cake with layers of cookie crumbs, cookie butter, vanilla ice cream, and whipped cream.
- Prep Time: 25 minutes
- Cook Time: 0 minutes
- Total Time: 6 hours 25 minutes
- Yield: 10 servings 1x
- Category: Dessert
- Method: No Bake
- Cuisine: International
- Diet: Vegetarian
Ingredients
- 32 Lotus Biscoff cookies, plus extra for topping
- 2 cups Biscoff cookie crumbs
- 6 tablespoons melted butter
- 1 1/2 cups Biscoff cookie butter, divided
- 4 cups vanilla ice cream, slightly softened
- 2 cups whipped topping or homemade whipped cream
- 8 oz cream cheese, softened
- 1/2 cup powdered sugar
- 1 teaspoon vanilla extract
- 1/4 cup heavy cream, optional for melting cookie butter
Instructions
- Line a loaf pan or square baking dish with parchment paper, leaving extra over the sides for easy lifting.
- Mix the Biscoff cookie crumbs with melted butter until evenly combined.
- Press half of the crumb mixture firmly into the bottom of the prepared pan to make the crust.
- In a large bowl, beat softened cream cheese, powdered sugar, and vanilla extract until smooth.
- Fold in the whipped topping until creamy and fluffy.
- Spread half of the cream mixture over the crust.
- Add a layer of softened vanilla ice cream and smooth it evenly.
- Warm 1 cup of Biscoff cookie butter with heavy cream if needed until pourable, then drizzle or spread it over the ice cream layer.
- Sprinkle the remaining Biscoff crumb mixture over the cookie butter layer.
- Add the remaining cream mixture on top and smooth evenly.
- Spread the remaining 1/2 cup Biscoff cookie butter over the top.
- Arrange whole Lotus Biscoff cookies across the top of the cake.
- Cover and freeze for at least 6 hours, or overnight, until firm.
- Lift the cake from the pan, slice with a warm knife, and serve chilled.
Notes
- Use softened ice cream for easier spreading.
- Chill the cake thoroughly before slicing.
- Store leftovers in the freezer.
Nutrition
- Serving Size: 1 slice
- Calories: 470
- Sugar: 35g
- Sodium: 220mg
- Fat: 28g
- Saturated Fat: 14g
- Unsaturated Fat: 10g
- Trans Fat: 0g
- Carbohydrates: 48g
- Fiber: 2g
- Protein: 6g
- Cholesterol: 45mg
Keywords: Lotus Biscoff ice cream cake, Cookie butter dessert, No bake Biscoff cake, Biscoff cookie cake, Easy no bake dessert, Layered ice cream dessert