Oh my goodness, let me tell you about my absolute obsession with this red velvet cake recipe! It’s the kind of dessert that makes any occasion feel special – whether it’s Valentine’s Day, an anniversary, or just a Tuesday when you need something decadent. I’ve been perfecting this version for years, ever since my Southern grandmother first showed me how the tangy cream cheese frosting plays perfectly against the moist, velvety crumb.
What makes this cake truly magical is how simple ingredients transform into something spectacular. That rich red color? Just wait until you see how the cocoa powder and food coloring work together. And the texture – oh honey, when you bite into those tender layers with that fluffy frosting… well, let’s just say you’ll understand why this recipe never lasts long in my house!
Why You’ll Fall Head Over Heels For This Red Velvet Cake
Listen, I know there are a million red velvet cake recipes out there, but trust me – this one’s different. Here’s why it’s become my go-to for every celebration (and let’s be honest, sometimes just because it’s Wednesday):
- The layers? So moist they practically melt in your mouth – no dry crumbs here!
- That cream cheese frosting is my secret weapon – just tangy enough to balance the sweet cake
- It’s got that perfect red velvet color that makes everyone stop and stare when you bring it out
- Simple enough for beginners but fancy enough to impress at any party
- My grandma’s little trick with the vinegar gives it that classic red velvet “oomph”
Seriously, one bite and you’ll understand why I make this at least once a month. It’s that good.
The Secret’s in the Ingredients: What Makes This Red Velvet Cake So Good
Okay, let’s talk ingredients – because this isn’t just any cake, and every little detail matters. I learned the hard way that skipping steps or substituting willy-nilly can lead to disaster (hello, brick-like cake of 2018). Here’s exactly what you’ll need, and why each one is non-negotiable:
- 2½ cups all-purpose flour – Spoon and level it, don’t scoop! We want light, fluffy layers, not dense hockey pucks.
- 1½ cups granulated sugar – The perfect amount to sweeten without overpowering that signature red velvet flavor.
- 1 tsp each baking soda & salt – Tiny but mighty – they’re the backbone of that perfect rise.
- 1 tsp cocoa powder – Just enough to deepen the color and add complexity, not make it chocolatey.
- 1½ cups vegetable oil – The secret to that melt-in-your-mouth texture. Yes, it’s a lot. Yes, it’s worth it.
- 1 cup buttermilk, room temp – Cold buttermilk = sad, dense cake. Let it sit out for at least 30 minutes.
- 2 large eggs, room temp – See above. Cold eggs don’t incorporate as well. Trust me on this.
- 2 tbsp red food coloring – Go for the good gel kind. The liquid stuff just won’t give you that vibrant red.
- 1 tsp each vanilla extract & white vinegar – The dynamic duo that gives red velvet its signature tang.
And for that swoon-worthy frosting:
- 16 oz cream cheese, softened – Not melted, not cold – it should dent slightly when you press it.
- 1 cup unsalted butter, softened – Same deal as the cream cheese. Patience is key!
- 4 cups powdered sugar – Sift it if you hate lumps (I always do).
- 1½ tsp vanilla extract + pinch of salt – Balances the sweetness like a dream.
See? Nothing too crazy, but each ingredient plays a crucial role. Now let’s make some magic!
How to Make Red Velvet Cake Recipe That’ll Steal the Show
Preparing the Cake Batter
First things first – grab two bowls, one big and one medium. In the big one, whisk together your flour, sugar, baking soda, salt, and that tiny-but-mighty teaspoon of cocoa powder. I like to sift them together to avoid any lumps – it makes the batter silky smooth.
Now, in the medium bowl, whisk the oil, buttermilk, eggs, food coloring, vanilla, and vinegar until they’re completely combined. This is where the magic starts! When you pour the wet into the dry ingredients, go slow at first – just a third of the liquid to start. This prevents the flour from flying everywhere (learned that the messy way!). Mix until just combined, then add the rest. You’ll get this gorgeous, velvety red batter that’s the perfect consistency – not too thick, not too runny.
Baking the Red Velvet Layers
Preheat that oven to 350°F (175°C) and line your three 8-inch pans with parchment rounds – trust me, this makes removal so much easier. Divide the batter evenly between them (I use a kitchen scale for precision). Smooth the tops with a spatula, then pop them in the oven.
Now the waiting game! Set your timer for 25 minutes, but don’t wander off. The cakes are done when they spring back lightly to touch and a toothpick comes out with just a few moist crumbs. Overbaking is the enemy of moist red velvet! Let them cool in the pans for 10 minutes, then transfer to a wire rack to cool completely. No cheating here – warm cakes make for melty frosting disasters.
Making the Cream Cheese Frosting
While those beauties cool, let’s make the frosting that makes this cake legendary. Beat the softened cream cheese and butter together until they’re completely smooth – about 2 minutes with a hand mixer. Scrape down the bowl often! Gradually add the powdered sugar, about a cup at a time, mixing well after each addition. When it’s all incorporated, beat in the vanilla and salt. You’re looking for fluffy perfection – if it’s too stiff, add a teaspoon of milk. Too thin? A bit more powdered sugar. This frosting should hold its shape when you lift the beaters.
Assembling the Cake
Place your first layer on a cake stand or plate. Spread about 3/4 cup of frosting evenly over the top – I like to use an offset spatula for this. Repeat with the second layer, then crown it with the third. Now frost the outside, starting with a thin “crumb coat” to seal in any loose crumbs. Pop it in the fridge for 15 minutes, then do your final, beautiful layer of frosting.
Here’s my pro tip: refrigerate the whole cake for at least 30 minutes before slicing. This sets the layers and gives you those picture-perfect clean slices. Worth the wait, I promise!
Tips for the Perfect Red Velvet Cake Recipe
After years of trial and (many) errors, I’ve learned a few tricks that make all the difference with this red velvet cake recipe. First – and I can’t stress this enough – room temperature ingredients aren’t optional! Cold eggs and buttermilk will make your batter curdle, and hard butter won’t cream properly. I leave everything out for at least an hour before baking.
When it comes to the food coloring, gel works way better than liquid for that signature vibrant red. And don’t skip the vinegar – that tiny teaspoon gives red velvet its distinctive tang. My biggest rookie mistake? Not chilling the frosted cake before slicing. That 30-minute wait means clean cuts and perfect layers every time. Trust me, your patience will be rewarded with the most gorgeous slices!
Fun Twists on the Classic Red Velvet Cake Recipe
While I adore the traditional version, sometimes it’s fun to mix things up! For chocolate lovers, try adding 1/4 cup cocoa powder to the batter (but reduce flour by 2 tbsp). Crushed pecans between layers add wonderful crunch. Feeling fancy? Swap the cream cheese frosting for a white chocolate ganache – just melt 8 oz white chocolate with 1/2 cup heavy cream, cool, then whip until fluffy. The possibilities are endless!
Serving Suggestions for Red Velvet Cake
Oh my goodness, presentation is everything with this beauty! I love serving thick slices with a piping hot cup of coffee – the bitterness cuts through the sweetness perfectly. For special occasions, I’ll arrange fresh raspberries or strawberries around the plate. And don’t forget the extra frosting dollop on the side – because when it comes to cream cheese frosting, more is always better!
Storing Your Red Velvet Cake
Okay, let’s talk storage because this cake’s too good to waste! The cream cheese frosting means it needs to stay refrigerated – just cover it loosely with plastic wrap or pop it in a cake carrier. It’ll stay fresh for 4-5 days this way (if it lasts that long!).
Now, here’s my trick for day-old perfection – let slices sit at room temperature for 15 minutes before serving. That little wait takes the chill off and brings back that heavenly soft texture. And if you’re feeling extra fancy? A quick 10-second microwave zap makes it taste just-baked all over again!
Red Velvet Cake Recipe FAQs
Q1. Can I use natural food coloring instead of red gel?
You can, but be warned – natural dyes like beet powder won’t give you that vibrant red velvet color we all love. If you go this route, you’ll need quite a bit more (start with 3-4 tbsp) and expect a more muted, pinkish hue. The cake will still taste amazing though!
Q2. My cream cheese frosting is too runny – help!
Oh honey, I’ve been there! First, make sure your butter and cream cheese were properly softened (not melted). If it’s still too thin, chill the bowl for 15 minutes, then beat in more powdered sugar 1/4 cup at a time. Hot kitchen? Work quickly and pop the frosted cake straight in the fridge.
Q3. Can I make this into cupcakes instead?
Absolutely! This red velvet recipe makes about 24 perfect cupcakes. Fill liners 2/3 full and bake at 350°F for 18-20 minutes. The cream cheese frosting pipes beautifully – just don’t overfill or you’ll have red velvet mushroom tops!
Q4. Why does my cake taste bitter?
That’s likely from too much baking soda. Always measure carefully – I use the spoon-and-level method. Also, make sure your cocoa powder is fresh! Stale cocoa can give off flavors. A tiny pinch of extra salt can help balance it out if this happens.
Q5. Can I freeze the layers ahead of time?
You bet! Wrap cooled cake layers tightly in plastic wrap, then foil. They’ll keep beautifully for up to 3 months. Thaw overnight in the fridge before frosting – the cold layers actually make assembly easier!
Nutritional Information
Just so you know – one slice of this glorious red velvet cake (about 1/12th of the cake) packs about 470 calories. The exact nutrition can vary based on your specific ingredients and brands, but let’s be real – when something tastes this good, we’re not counting, are we?
Share Your Red Velvet Cake Experience
Did you make this red velvet masterpiece? I’d love to hear all about it! Leave a comment below with your thoughts, snap a photo of your creation, or share it with friends. Happy baking, y’all!
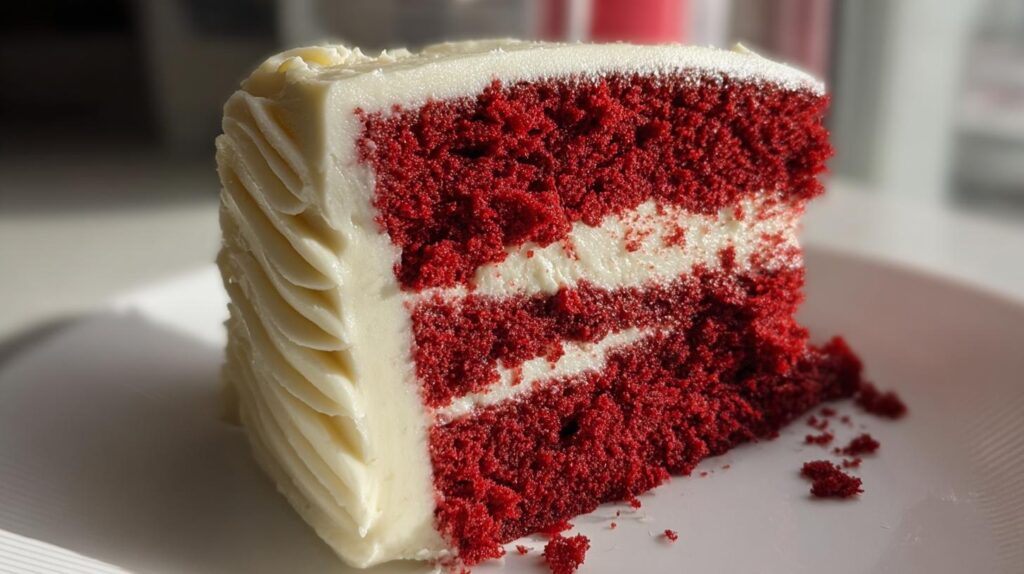
PrintIrresistible Red Velvet Cake Recipe in 3 Simple Steps
This moist and vibrant red velvet cake is layered with luscious cream cheese frosting—a showstopper dessert perfect for celebrations, date nights, or cozy nights in!
- Prep Time: 25 minutes
- Cook Time: 30 minutes
- Total Time: 1 hour 15 minutes
- Yield: 12 servings 1x
- Category: Dessert
- Method: Baking
- Cuisine: Southern
- Diet: Vegetarian
Ingredients
- 2½ cups all-purpose flour
- 1½ cups granulated sugar
- 1 tsp baking soda
- 1 tsp salt
- 1 tsp cocoa powder
- 1½ cups vegetable oil
- 1 cup buttermilk, room temp
- 2 large eggs, room temp
- 2 tbsp red food coloring
- 1 tsp vanilla extract
- 1 tsp white vinegar
- 16 oz cream cheese, softened
- 1 cup unsalted butter, softened
- 4 cups powdered sugar
- 1½ tsp vanilla extract
- Pinch of salt
Instructions
- In a large bowl, whisk together flour, sugar, baking soda, salt, and cocoa powder. In another bowl, mix oil, buttermilk, eggs, food coloring, vanilla, and vinegar. Combine the wet with the dry for a super smooth, rich batter.
- Pour batter evenly into three 8-inch round cake pans lined with parchment. Bake at 350°F (175°C) for 25–30 minutes, or until a toothpick comes out clean. Cool completely.
- Beat cream cheese and butter until fluffy, then slowly add powdered sugar, vanilla, and salt.
- Layer cakes with a generous amount of frosting between each. Frost the outside for that bakery-style finish.
- Chill for 30 minutes to help set the layers. Slice and serve.
Notes
- Use room temperature ingredients for best results.
- Chill the cake before slicing for cleaner cuts.
Nutrition
- Serving Size: 1 slice
- Calories: 470
- Sugar: 35g
- Sodium: 300mg
- Fat: 25g
- Saturated Fat: 10g
- Unsaturated Fat: 12g
- Trans Fat: 0g
- Carbohydrates: 55g
- Fiber: 1g
- Protein: 5g
- Cholesterol: 60mg
Keywords: Red Velvet Cake Recipe, Cream cheese frosting cake, Moist red velvet layers, Classic celebration dessert, Valentine’s Day cake idea, Southern red velvet cake, Homemade layered cake